<?xml version="1.0" encoding="utf-8"?><feed xmlns="http://www.w3.org/2005/Atom" ><generator uri="https://jekyllrb.com/" version="3.10.0">Jekyll</generator><link href="https://natsurainko.github.io/feed.xml" rel="self" type="application/atom+xml" /><link href="https://natsurainko.github.io/" rel="alternate" type="text/html" /><updated>2026-11-06T06:36:19+00:00</updated><id>https://natsurainko.github.io/feed.xml</id><title type="html">natsurainko</title><subtitle>Technical Notes</subtitle><author><name>natsurainko</name></author><entry><title type="html">Hello World Test</title><link href="https://natsurainko.github.io/2026/11/06/hello-world.html" rel="alternate" type="text/html" title="Hello World Test" /><published>2026-11-06T00:00:00+00:00</published><updated>2026-11-06T00:00:00+00:00</updated><id>https://natsurainko.github.io/2026/11/06/hello-world</id><content type="html" xml:base="https://natsurainko.github.io/2026/11/06/hello-world.html"><![CDATA[<div class="language-csharp highlighter-rouge"><div class="highlight"><pre class="highlight"><code><span class="k">public</span> <span class="k">class</span> <span class="nc">HelloWorld</span>
<span class="p">{</span>
    <span class="k">public</span> <span class="k">static</span> <span class="k">void</span> <span class="nf">Main</span><span class="p">()</span>
    <span class="p">{</span>
        <span class="n">Console</span><span class="p">.</span><span class="nf">WriteLine</span><span class="p">(</span><span class="s">"Hello, world!"</span><span class="p">);</span>
    <span class="p">}</span>
<span class="p">}</span>
</code></pre></div></div>]]></content><author><name>natsurainko</name></author><summary type="html"><![CDATA[public class HelloWorld { public static void Main() { Console.WriteLine("Hello, world!"); } }]]></summary></entry><entry xml:lang="zh-CN"><title type="html">ConnectX 服务端部署指南</title><link href="https://natsurainko.github.io/2025/03/17/connectx-server-deployment.html" rel="alternate" type="text/html" title="ConnectX 服务端部署指南" /><published>2025-03-17T22:43:37+00:00</published><updated>2025-03-17T22:43:37+00:00</updated><id>https://natsurainko.github.io/2025/03/17/connectx-server-deployment</id><content type="html" xml:base="https://natsurainko.github.io/2025/03/17/connectx-server-deployment.html"><![CDATA[<h2 id="connectx-是什么">ConnectX 是什么</h2>

<p>ConnectX 是一个跨平台的 Minecraft P2P 在线多人库，支持异地跨网联机，采用 C# 开发，使用高性能套接字实现出色的转发性能，由 Zerotier SDK 实现 P2P 功能。
Github 仓库地址：<a href="https://github.com/Corona-Studio/ConnectX">ConnectX</a></p>

<h2 id="connectx-服务端部署指南">ConnectX 服务端部署指南</h2>

<h3 id="前置条件">前置条件</h3>

<ul>
  <li>一台装有 <code class="language-plaintext highlighter-rouge">Visual Studio</code>，且安装了 <code class="language-plaintext highlighter-rouge">.NET 桌面开发</code> 工作负荷，用于编译 <code class="language-plaintext highlighter-rouge">ConnectX.Server</code> 以及 <code class="language-plaintext highlighter-rouge">ConnectX.Relay</code> 的可执行文件</li>
  <li>一台拥有公网的服务器，用于部署 <code class="language-plaintext highlighter-rouge">ConnectX.Server</code> 以及 <code class="language-plaintext highlighter-rouge">ConnectX.Relay</code> 服务</li>
</ul>

<blockquote>
  <p>服务器系统推荐使用 Ubuntu 22.04 或者是 Windows Server，因为后续需要安装 .NET 9 运行时（本人在 Ubuntu 24.04 上安装 .NET 9 没成功..）</p>
</blockquote>

<h3 id="编译可执行文件">编译可执行文件</h3>

<ol>
  <li>
    <p>Clone 本项目仓库到本地</p>
  </li>
  <li>
    <p>使用 Visual Studio 打开本项目</p>
  </li>
  <li>
    <p>编辑项目文件（可选）</p>
  </li>
</ol>

<p>如果你不想为 <code class="language-plaintext highlighter-rouge">ConnectX.Server</code>  另外单独配置 Sql 数据库服务，你可以将 <code class="language-plaintext highlighter-rouge">Program.cs</code> 文件中的以下几行代码</p>
<div class="language-csharp highlighter-rouge"><div class="highlight"><pre class="highlight"><code><span class="n">services</span><span class="p">.</span><span class="n">AddDbContext</span><span class="p">&lt;</span><span class="n">RoomOpsHistoryContext</span><span class="p">&gt;(</span><span class="n">o</span> <span class="p">=&gt;</span>
    <span class="n">o</span><span class="p">.</span><span class="nf">UseSqlServer</span><span class="p">(</span><span class="n">connectionString</span><span class="p">,</span> <span class="n">b</span> <span class="p">=&gt;</span> <span class="n">b</span><span class="p">.</span><span class="nf">MigrationsAssembly</span><span class="p">(</span><span class="s">"ConnectX.Server"</span><span class="p">)));</span>
</code></pre></div></div>
<p>替换为</p>
<div class="language-csharp highlighter-rouge"><div class="highlight"><pre class="highlight"><code><span class="n">services</span><span class="p">.</span><span class="n">AddDbContext</span><span class="p">&lt;</span><span class="n">RoomOpsHistoryContext</span><span class="p">&gt;(</span><span class="n">o</span> <span class="p">=&gt;</span>
    <span class="n">o</span><span class="p">.</span><span class="nf">UseSqlite</span><span class="p">(</span><span class="n">connectionString</span><span class="p">,</span> <span class="n">b</span> <span class="p">=&gt;</span> <span class="n">b</span><span class="p">.</span><span class="nf">MigrationsAssembly</span><span class="p">(</span><span class="s">"ConnectX.Server"</span><span class="p">)));</span>
</code></pre></div></div>
<p>它会让你的 <code class="language-plaintext highlighter-rouge">ConnectX.Server</code> 运行时使用 Sqlite 本地数据库</p>

<ol>
  <li>发布项目 <code class="language-plaintext highlighter-rouge">ConnectX.Server</code> 以及 <code class="language-plaintext highlighter-rouge">ConnectX.Relay</code></li>
</ol>

<p>请根据你的服务器系统选择目标平台是 <code class="language-plaintext highlighter-rouge">linux-x64</code> 还是 <code class="language-plaintext highlighter-rouge">win-x64</code> 或者其他，部署模式选择 <code class="language-plaintext highlighter-rouge">依赖框架</code> ，文件发布选项启用 <code class="language-plaintext highlighter-rouge">生成单个文件</code></p>

<blockquote>
  <p><strong>重要：</strong>
现阶段请不要为 <code class="language-plaintext highlighter-rouge">ConnectX.Server</code> 以及 <code class="language-plaintext highlighter-rouge">ConnectX.Relay</code> 启用 <code class="language-plaintext highlighter-rouge">PublishAOT</code> ，这可能会导致运行不正常</p>
</blockquote>

<h3 id="部署-zerotier-服务">部署 Zerotier 服务</h3>

<p><code class="language-plaintext highlighter-rouge">ConnectX.Server</code> 需要 <code class="language-plaintext highlighter-rouge">Zerotier 控制器</code> 前置服务</p>

<ol>
  <li>安装 Zerotier</li>
</ol>

<p>前往 <a href="https://www.zerotier.com/download/">Download Zerotier</a>，选择适合你的服务器系统的版本安装</p>

<ol>
  <li>配置 Zerotier</li>
</ol>

<p>设置 Zerotier 开机启动，如果你是 linux ，请输入 <code class="language-plaintext highlighter-rouge">systemctl enable zerotier-one</code> ，Windows 安装完后默认可以在任务管理器里面看到开机启动</p>

<p>验证 Zerotier 是否启动成功，在终端中输入 <code class="language-plaintext highlighter-rouge">zerotier-cli info</code> ，<br />
如果出现 <code class="language-plaintext highlighter-rouge">200 info 495b749d3c 1.14.2 TUNNELED</code> 或者是 <code class="language-plaintext highlighter-rouge">200 info 495b749d3c 1.14.2 ONLINE</code> 的字样则说明成功</p>

<ol>
  <li>获取 Zerotier 服务信息</li>
</ol>

<p>linux 下 Zerotier 的数据文件夹在 <code class="language-plaintext highlighter-rouge">/var/lib/zerotier-one</code> 目录下，<br />
Windows 下 Zerotier 的数据文件夹在 <code class="language-plaintext highlighter-rouge">C:\ProgramData\ZeroTier\One</code> 目录下</p>

<p>其中 <code class="language-plaintext highlighter-rouge">authtoken.secret</code> 储存的是 Zerotier 控制器的访问 Token ，请记下它<br />
<code class="language-plaintext highlighter-rouge">zerotier-one.port</code> 储存的是 Zerotier 控制器的访问访问端口，默认为 <code class="language-plaintext highlighter-rouge">9993</code> ，请记下它</p>

<ol>
  <li>部署 Zerotier Moon 卫星级服务器 （可选）</li>
</ol>

<p>请参考这篇文章：<a href="https://www.wnark.com/archives/152.html">https://www.wnark.com/archives/152.html</a></p>

<blockquote>
  <p><strong>重要：</strong>
暂不清楚部署 Moon 卫星级服务器到底能不能对 P2P 连接起到正向作用，需要验证</p>
</blockquote>

<ol>
  <li>放行 Zerotier 控制器端口 (Tcp/Udp)</li>
</ol>

<h3 id="部署-connectxserver-以及-connectxrelay-服务">部署 <code class="language-plaintext highlighter-rouge">ConnectX.Server</code> 以及 <code class="language-plaintext highlighter-rouge">ConnectX.Relay</code> 服务</h3>

<ol>
  <li>
    <p>将先前发布的可执行文件及其依赖 Dll 上传到服务器，连同发布目录下的 <code class="language-plaintext highlighter-rouge">appsettings.json</code> 一起上传</p>
  </li>
  <li>
    <p>配置 <code class="language-plaintext highlighter-rouge">ConnectX.Server</code></p>
  </li>
</ol>

<p>修改 <code class="language-plaintext highlighter-rouge">Server:ListenAddress</code> 为 <code class="language-plaintext highlighter-rouge">0.0.0.0</code>
修改 <code class="language-plaintext highlighter-rouge">Server:ServerId</code> 为一个 Guid 字符串，例 <code class="language-plaintext highlighter-rouge">ddad03b9-d122-421d-add7-1d09e65b4295</code>
修改 <code class="language-plaintext highlighter-rouge">ZeroTier:EndPoint</code> 为 <code class="language-plaintext highlighter-rouge">http://127.0.0.1:{port}</code> ，其中 <code class="language-plaintext highlighter-rouge">{port}</code> 为之前你记下的 Zerotier 控制器服务的端口<br />
修改 <code class="language-plaintext highlighter-rouge">ZeroTier:Token</code> 为之前你记下的 Zerotier 控制器服务的访问 Token<br />
修改 <code class="language-plaintext highlighter-rouge">ConnectionStrings:Default</code> 为你的 Sql 数据库，如果你在前面修改代码使用了 Sqlite ，请将该项写入为 <code class="language-plaintext highlighter-rouge">Data Source=Sqlite.db</code> ，运行后会自动生成 <code class="language-plaintext highlighter-rouge">Sqlite.db</code> 文件作为数据库</p>

<ol>
  <li>配置 <code class="language-plaintext highlighter-rouge">ConnectX.Relay</code></li>
</ol>

<p>修改 <code class="language-plaintext highlighter-rouge">RelayServer:ListenAddress</code> 为 <code class="language-plaintext highlighter-rouge">0.0.0.0</code><br />
修改 <code class="language-plaintext highlighter-rouge">RelayServer:PublicListenAddress</code> 为运行 <code class="language-plaintext highlighter-rouge">ConnectX.Relay</code> 的服务器的公网地址<br />
修改 <code class="language-plaintext highlighter-rouge">Server:ListenPort</code> 为上面 <code class="language-plaintext highlighter-rouge">ConnectX.Server</code> 的监听端口，默认为 <code class="language-plaintext highlighter-rouge">3535</code><br />
修改 <code class="language-plaintext highlighter-rouge">Server:ServerId</code> 为上面 <code class="language-plaintext highlighter-rouge">ConnectX.Server</code> 的 <code class="language-plaintext highlighter-rouge">ServerId</code><br />
如果你将 <code class="language-plaintext highlighter-rouge">ConnectX.Relay</code> 和 <code class="language-plaintext highlighter-rouge">ConnectX.Server</code> 放在一个服务器上运行，则保留原有配置 <code class="language-plaintext highlighter-rouge">127.0.0.1</code> ，否则请修改 <code class="language-plaintext highlighter-rouge">Server:ListenAddress</code> 为上面 <code class="language-plaintext highlighter-rouge">ConnectX.Server</code> 的公网地址，以便访问</p>

<blockquote>
  <p><strong>重要：</strong>
<code class="language-plaintext highlighter-rouge">ConnectX.Relay</code> 可以有多个部署在不同的服务器上，连接到同一个 <code class="language-plaintext highlighter-rouge">ConnectX.Server</code></p>
</blockquote>

<ol>
  <li>
    <p>放行 <code class="language-plaintext highlighter-rouge">ConnectX.Server</code> 以及 <code class="language-plaintext highlighter-rouge">ConnectX.Relay</code> 的端口 (Tcp/Udp)，默认分别为 <code class="language-plaintext highlighter-rouge">3535</code> 和 <code class="language-plaintext highlighter-rouge">3536</code></p>
  </li>
  <li>
    <p>运行 <code class="language-plaintext highlighter-rouge">ConnectX.Server</code> 以及 <code class="language-plaintext highlighter-rouge">ConnectX.Relay</code></p>
  </li>
</ol>

<p>若 <code class="language-plaintext highlighter-rouge">ConnectX.Server</code> 输出中出现</p>
<div class="language-text highlighter-rouge"><div class="highlight"><pre class="highlight"><code>[25-03-16 11:48:56 INF]: [ZTNodeService] Fetching ZT server node status...
[25-03-16 11:48:56 INF]: [ZTNodeService] Node status received, ID [495b749d3c] Version [1.14.2]
[25-03-16 11:48:57 INF]: [CLIENT_MANAGER] Watchdog started.
</code></pre></div></div>
<p>则 <code class="language-plaintext highlighter-rouge">ConnectX.Server</code> 成功连接到 Zerotier 控制器</p>

<p>若 <code class="language-plaintext highlighter-rouge">ConnectX.Relay</code> 输出中出现</p>
<div class="language-text highlighter-rouge"><div class="highlight"><pre class="highlight"><code>[25-03-16 11:49:03 INF]: [CLIENT] Sending signin message to server...
[25-03-16 11:49:04 INF]: [CLIENT] Connected and signed to server at endpoint 127.0.0.1:3535
[25-03-16 11:49:04 INF]: [CLIENT] Server public address acquired [xxx.xx.xx.xx:3536]
[25-03-16 11:49:04 INF]: [CLIENT] Successfully registered relay server.
</code></pre></div></div>
<p>则 <code class="language-plaintext highlighter-rouge">ConnectX.Relay</code> 服务成功连接到 <code class="language-plaintext highlighter-rouge">ConnectX.Server</code> 服务</p>

<h3 id="至此完成">至此完成</h3>

<p><code class="language-plaintext highlighter-rouge">ConnectX.Server</code> 以及 <code class="language-plaintext highlighter-rouge">ConnectX.Relay</code> 的守护进程等配置在此不再过多赘述</p>

<p>使用 <code class="language-plaintext highlighter-rouge">ConnectX.Client</code> 连接时请使用 <code class="language-plaintext highlighter-rouge">ConnectX.Server</code> 的公网地址和端口进行连接</p>]]></content><author><name>natsurainko</name></author><category term="DotNet-开发" /><category term="C#" /><category term="Minecraft" /><category term=".NET 9" /><summary type="html"><![CDATA[ConnectX 是什么]]></summary></entry><entry xml:lang="zh-CN"><title type="html">Windows 使用 VMware 17 Pro 安装 Mac OS，搭建 iOS 开发环境</title><link href="https://natsurainko.github.io/2024/10/27/windows-vmware-macos-ios.html" rel="alternate" type="text/html" title="Windows 使用 VMware 17 Pro 安装 Mac OS，搭建 iOS 开发环境" /><published>2024-10-27T22:43:37+00:00</published><updated>2024-10-27T22:43:37+00:00</updated><id>https://natsurainko.github.io/2024/10/27/windows-vmware-macos-ios</id><content type="html" xml:base="https://natsurainko.github.io/2024/10/27/windows-vmware-macos-ios.html"><![CDATA[<h4 id="本文参考文章">本文参考文章</h4>

<blockquote>
  <p><a href="https://zhuanlan.zhihu.com/p/663874133">【2023最新版】VMware Workstation Pro v17安装教程+激活秘钥</a><br />
<a href="https://zhuanlan.zhihu.com/p/658521465">Windows用VM虚拟机安装MacOS Ventura 13.6系统全流程教程</a></p>
</blockquote>

<h3 id="前言与其他方案论述">前言与其他方案论述</h3>

<p>在最开始选择在 Windows 搭建 iOS 开发环境时，尽管 VMware 虚拟机（或是 Hyper-V）运行 Mac OS 的方案已经很多，但我第一选择没有选择它（尽管最后兜了一圈还是绕回来了）</p>

<p><strong>先来说说 VMware 方案的缺点</strong></p>
<ol>
  <li>VMware 原生不支持 Mac OS 的安装，是需要使用第三方 Unlocker 之后才能创建 Mac OS 的虚拟机</li>
  <li>VMware 虚拟机运行的 Mac OS 事实上没办法调用显卡，也没任何方法安装显卡驱动或是借助某些手段间接调用显卡，这使得其对 CPU 的性能要求非常高</li>
  <li>VMware Tools 对于显示渲染的优化似乎并不好，甚至是负优化。在我测试时安装 VMware Tools 后，反而导致虚拟机容易崩溃，貌似因为反复渲染而导致虚拟机死机</li>
</ol>

<p><strong>VMware 方案的优点</strong></p>
<ol>
  <li>VMware（或 Hyper-V 等）虚拟机方便管理与保存虚拟机状态</li>
  <li>VMware（或 Hyper-V 等）虚拟机能够直接连接物理 USB，从而能从虚拟机调试物理设备（这是最为重要的）</li>
</ol>

<p>最开始时我首先考虑到了 VMware 虚拟机的缺点，所以一开始采用的是 OSX-KVM 的方案<br />
具体文章可以参考这两篇</p>

<blockquote>
  <p><a href="https://classsoft.net/archives/Smoothly-run-macOS-VMs-on-Windows10--with-WSL-and-QEMU-KVM.html">在Windows11 WSL上通过QEMU KVM流畅运行macOS虚拟机（2024）</a><br />
<a href="https://blog.hal.wang/7afa8fc1/">在 Windows 上流畅使用 MacOS 虚拟机</a></p>
</blockquote>

<p><strong>尽管 OSX-KVM 方案确实有它的好处</strong><br />
例如：</p>
<ol>
  <li>由于 Linux 下的 KVM 能够通过虚拟 GPU 硬件，间接调用物理显卡，因此在显示性能上远远超过 VMware 方案</li>
  <li>调用 GPU 渲染，因此大大减轻了 CPU 的负载</li>
</ol>

<p><strong>但是！在我一遍遍排除万难在 Windows 11 上安装了 Wsl2，又在 Wsl 里面成功配置了 KVM 虚拟机，又成功安装 Mac OS 到了 KVM 虚拟机之后，最终才发现 USB 总线没办法透过两层虚拟机传给 Mac OS，这意味我没办法进行实机调试和安装，最终放弃了这个方案</strong></p>

<blockquote>
  <p>当然如果只是想在 Windows 上体验 Mac OS，你可以选择此方案，只是稍微有些折腾，但是是可行的（我实测过可以，但过程有些痛苦）</p>
</blockquote>

<h3 id="安装-vmware-17-pro-虚拟机">安装 VMWare 17 Pro 虚拟机</h3>

<p>安装虚拟机和过程在此不赘述，因为相关文章太多了<br />
这里提供一篇安装步骤参考文章，以及找到的一个城通网盘的 VMWare 17 Pro 下载链接<br />
<em>（目前 VMware 被收购之后，下载软件本体变得极为困难，那个破登录、许可证始终搞不好）</em></p>

<p><a href="https://zhuanlan.zhihu.com/p/663874133">【2023最新版】VMware Workstation Pro v17安装教程+激活秘钥</a><br />
<a href="https://545c.com/d/7369060-52756935-0f8a8d">城通网盘 VMware17</a></p>

<h3 id="在-vmware-虚拟机中安装-mac-os">在 VMware 虚拟机中安装 Mac OS</h3>

<p>这里提供 Unlocker GitHub 下载地址，以及两个 Mac OS 的安装镜像，分别是 13 Ventura 和 14 Sonoma</p>

<p><a href="https://github.com/DrDonk/unlocker/releases">[GitHub Releases] Unlocker 4.2.7</a><br />
<a href="https://download2390.mediafire.com/6nv18jgzbzkgFHkjejBmYTrFY2R_m_oOB0jswGjQK5WXIa_CPxyeYYiwCxgB3KynQxb0JySfjwrqWEgQpJqIoKvLky_bdcZnOCIdNzCBjo_-7Fqo6yCD0bHjszxpmK1PFFfWGgxSJ4hgB8SsJMlKaGPaLW3Aw4a8i3jNj0jrju52EF4W/dcji26zay7s3p8r/macOS+Ventura+ISO+for+VM+by+techrechard.com.iso">[mediafire] macOS Ventura ISO for VM by techrechard.com.iso</a><br />
<a href="https://download2438.mediafire.com/0xh6gfoh7vdgDbb5RDXM-9hY8glz8qexIGeY3iurbafC0yfjOxEqCo3JwOmmgwv5TQekTAydtanpqBzRCshZLjvCscoq9RL5hmHMYLotXYddqxQ8Pbw28ejhAeE5abz8659XyJBBO8McEa8XR0t2XTgsJdo_0m412uQ2c7zjuTOJ/vku90kjifs1fmu0/macOS+Sonoma+ISO+by+techrechard.com.iso">[mediafire] macOS Sonoma ISO by techrechard.com.iso</a></p>

<blockquote>
  <p>我个人建议选择 14 Sonoma 的镜像安装，<br />
因为这个 13 Ventura 的镜像最高支持的 Xcode 版本是 <code class="language-plaintext highlighter-rouge">Xcode 14.3.1</code> 而它最多支持到 <code class="language-plaintext highlighter-rouge">iOS 16.4</code>，<br />
现在最新的都已经是 <code class="language-plaintext highlighter-rouge">iOS 18.1</code>，像我自己的设备是 <code class="language-plaintext highlighter-rouge">iOS 17.4</code>，用 Ventura 完全没法开发，<br />
而 <code class="language-plaintext highlighter-rouge">macOS Sonoma 14.5</code> 则支持最新的 <code class="language-plaintext highlighter-rouge">iOS 18.1</code>（提供的镜像是 14.0 的需要自己更新系统）</p>
</blockquote>

<p>具体安装请参考这篇文章<br />
<a href="https://zhuanlan.zhihu.com/p/658521465">Windows用VM虚拟机安装MacOS Ventura 13.6系统全流程教程</a></p>

<h3 id="配置-mac-os-虚拟机的序列号">配置 Mac OS 虚拟机的序列号</h3>

<p>在上一步安装 Mac OS 的步骤教程中，有一步是让你往虚拟机配置文件中添加如下配置</p>
<div class="language-plaintext highlighter-rouge"><div class="highlight"><pre class="highlight"><code>board-id.reflectHost = "FALSE"
board-id = "Mac-AA95B1DDAB278B95" 
hw.model.reflectHost = "FALSE" 
hw.model = "MacBookPro19,1" 
serialNumber.reflectHost = "FALSE" 
serialNumber = "C01234567890"
</code></pre></div></div>
<p>这一段配置其实就是在配置虚拟机的序列号，但是很明显上面的序列号代码 <code class="language-plaintext highlighter-rouge">serialNumber</code> 是乱写的</p>

<p><strong>为什么要配置序列号代码</strong></p>

<p>因为在高版本 Mac OS 登录 App Store 的时候会验证你的机器码（主要包括主板 Id，机器序列号，BIOS 序列号等）<br />
如果乱写，或是三个对不上的话，是没办法登录 App Store 的<br />
下面找了一段实测可以使用的机器码</p>

<div class="language-plaintext highlighter-rouge"><div class="highlight"><pre class="highlight"><code>board-id.reflectHost = "FALSE"
board-id = "Mac-94245B3640C91C81"
hw.model.reflectHost = "FALSE"
hw.model = "MacBook Pro"
serialNumber.reflectHost = "FALSE"
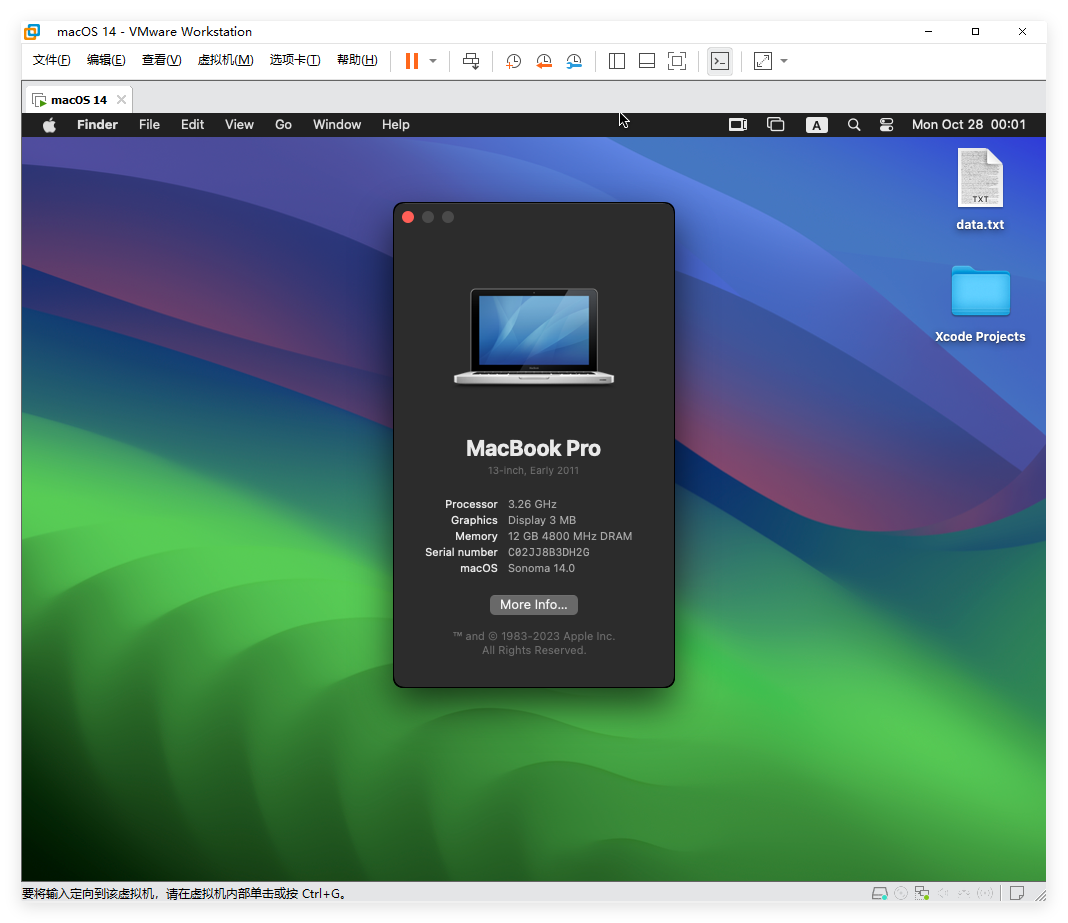
serialNumber = "C02JJ8B3DH2G"
smbios.reflectHost = "FALSE"
</code></pre></div></div>

<p>当然你也可以使用其他的 <em>三码工具</em> 来生成正确的机器码<br />
例如 <a href="https://blog.csdn.net/Z17362251225/article/details/125891385">黑苹果自动获取与注入三码的方法，附相关工具，解锁iCloud变白果！</a><br />
不过我们只需要拿到生成好的三码，之后写入到上面的配置文件的对应位置，不需要用那些注入工具</p>

<h3 id="关于-vmware-tools">关于 VMware Tools</h3>

<p>我自己在使用的时候发现安装了 <code class="language-plaintext highlighter-rouge">VMware Tools</code> 之后容易导致虚拟机一些渲染问题<br />
同时加重了渲染负担，容易导致虚拟机渲染卡死，崩溃等问题</p>

<blockquote>
  <p><strong>我个人认为是不建议安装的</strong>，尽管不装它也会导致一些问题，比如无法调整分辨率之类的，也请各位酌情考虑是否安装</p>
</blockquote>

<h3 id="vmware-虚拟机优化">VMware 虚拟机优化</h3>

<p>有许多方案从不同的角度对虚拟机进行优化</p>

<ol>
  <li>使用 beamoff， 参考安装 Mac OS 教程流程的第六步</li>
  <li>修改最小化动画，参考 <a href="https://jingyan.baidu.com/article/3aed632e64f485311180910f.html">苹果电脑设置应用最小化窗口时动画效果？</a></li>
  <li>使用 Onyx，参考 <a href="https://blog.csdn.net/Deng_Xian_Sheng/article/details/124533828">优化不必要的动画，以减少Mac卡顿</a></li>
</ol>

<h3 id="xcode-开发环境配置">Xcode 开发环境配置</h3>

<h4 id="安装-xcode">安装 Xcode</h4>

<p>请在此处选择合适版本的 Xcode 软件包下载并进行安装<br />
<a href="https://developer.apple.com/download/all/">More Downloads</a></p>

<h4 id="安装-ios-模拟器">安装 iOS 模拟器</h4>

<p><strong>首先需要强调的是，任何 iOS 真机调试，都需要 iOS 对应版本的模拟器</strong><br />
尽管 Xcode 安装时，会自带勾选一个该 Xcode 版本发布时最新的 iOS 版本的模拟器，但是这在大多数情况下都不适合真机调试<br />
所以更多的你需要安装对应版本的 iOS 模拟器，你可以手动安装，就像下面这篇文章一样，你也可以在连接 iPhone 时，通过连接提示来安装对应的模拟器</p>

<p>关于手动安装请参考 <a href="https://blog.csdn.net/RreamigOfGirls/article/details/138581052">Xcode15真机调试iOS17的方法</a></p>

<h4 id="连接-iphone-到-mac-os">连接 iPhone 到 Mac OS</h4>

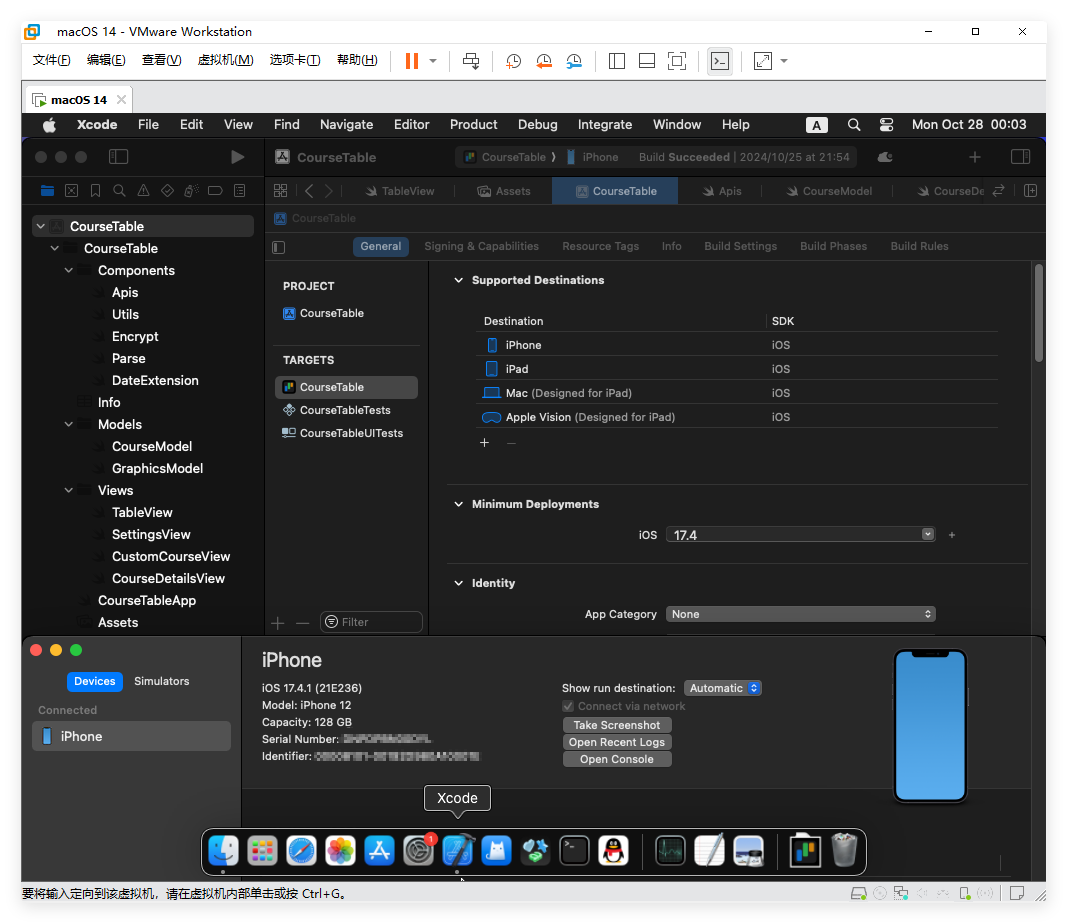
<p>直接连接 iPhone 到电脑，在虚拟机已经启动的时候，第一次连接时 iPhone 会提示是否连接此设备到虚拟机，此时点击是即可，或者也可以在 iPhone 已连接到电脑后，在 VMware 虚拟机窗口的右下角，找到一排图标，其中找到手机的图标，右键它打开菜单选择连接</p>

<h3 id="完成">完成</h3>

<p><strong>至此完成了整个开发环境的搭建</strong><br />
过程十分艰难，我在此也只是概述其中步骤，并之抓了几个注意点阐述，更多的还是需要网上查阅大量的资料，结合自身情况考虑每一步操作</p>

<p><img src="/images/2024-10-28/1.png" alt="展示 1" title="属性" />
<img src="/images/2024-10-28/2.png" alt="展示 2" title="Xcode 连接 iPhone" /></p>]]></content><author><name>natsurainko</name></author><category term="开发实践" /><category term="iOS" /><category term="VMware" /><category term="Xcode" /><summary type="html"><![CDATA[本文参考文章]]></summary></entry><entry xml:lang="zh-CN"><title type="html">使用 hexo + github pages 搭建个人博客</title><link href="https://natsurainko.github.io/2024/10/23/hexo-github-pages.html" rel="alternate" type="text/html" title="使用 hexo + github pages 搭建个人博客" /><published>2024-10-23T21:55:53+00:00</published><updated>2024-10-23T21:55:53+00:00</updated><id>https://natsurainko.github.io/2024/10/23/hexo-github-pages</id><content type="html" xml:base="https://natsurainko.github.io/2024/10/23/hexo-github-pages.html"><![CDATA[<blockquote>
  <p><a href="https://mini-pi.github.io/2024/02/28/how-to-make-blog-wedsite/">本文参考文章地址</a></p>
</blockquote>

<h2 id="快速开始">快速开始</h2>

<h3 id="创建-github-仓库">创建 GitHub 仓库</h3>

<p>创建一个名为 <code class="language-plaintext highlighter-rouge">&lt;username&gt;.github.io</code> 的仓库，其中 <code class="language-plaintext highlighter-rouge">&lt;username&gt;</code> 替换为你自己的用户名称<br />
例如我的仓库 <a href="https://github.com/natsurainko/natsurainko.github.io">natsurainko.github.io</a></p>

<h3 id="创建分支">创建分支</h3>

<p>在创建的 <code class="language-plaintext highlighter-rouge">&lt;username&gt;.github.io</code> 仓库下新建一个分支 <code class="language-plaintext highlighter-rouge">source</code> 用于存放你 <code class="language-plaintext highlighter-rouge">hexo</code> 的源代码，<br />
而原分支 <code class="language-plaintext highlighter-rouge">main</code> 等下将用于 <code class="language-plaintext highlighter-rouge">GitHub Pages</code> 的部署</p>

<h3 id="本地部署-hexo">本地部署 hexo</h3>

<p>克隆 <code class="language-plaintext highlighter-rouge">&lt;username&gt;.github.io</code> 仓库到本地，并切换到 <code class="language-plaintext highlighter-rouge">source</code> 分支<br />
在此目录下运行以下命令</p>
<div class="language-bash highlighter-rouge"><div class="highlight"><pre class="highlight"><code>npm <span class="nb">install</span> <span class="nt">-g</span> hexo-cli
hexo init blog
<span class="nb">cd </span>blog
npm <span class="nb">install</span>
</code></pre></div></div>

<p>命令会在仓库目录下新建文件夹 <code class="language-plaintext highlighter-rouge">/blog</code><br />
并初始化 hexo 及其配置文件<br />
接下来尝试运行这条命令来启动 hexo 本地服务器</p>
<div class="language-bash highlighter-rouge"><div class="highlight"><pre class="highlight"><code>hexo server
</code></pre></div></div>
<p>成功运行的话就算本地配置成功了<br />
你可以将现在这部分的代码提交上分支进行保存</p>

<h3 id="配置-hexo-主题">配置 hexo 主题</h3>

<p>引用的帖子里面使用 Next 主题，<br />
但如你所见，我自己搭建时使用的是 <code class="language-plaintext highlighter-rouge">安知鱼主题</code> 具体配置步骤可以看<a href="https://docs.anheyu.com/initall.html">这篇文档</a></p>
<blockquote>
  <p>其他 hexo 主题可以看官方<a href="https://hexo.io/themes/">主题浏览页面</a></p>
</blockquote>

<p>但配置 hexo 主题基本步骤基本都相同，就是<br />
克隆主题仓库到 <code class="language-plaintext highlighter-rouge">/blog/themes/&lt;theme&gt;</code> ，其中 <code class="language-plaintext highlighter-rouge">&lt;theme&gt;</code> 为这个主题的名称<br />
然后修改文件 <code class="language-plaintext highlighter-rouge">/blog/_config.yml</code></p>
<div class="language-yaml highlighter-rouge"><div class="highlight"><pre class="highlight"><code><span class="na">theme</span><span class="pi">:</span> <span class="s">&lt;theme&gt;</span>
</code></pre></div></div>

<p>然后重新运行 <code class="language-plaintext highlighter-rouge">hexo server</code> 应用主题</p>

<p>对于每个主题的细节配置，请修改这个文件 <code class="language-plaintext highlighter-rouge">/blog/themes/&lt;theme&gt;/_config.yml</code>，<br />
每个主题的 <code class="language-plaintext highlighter-rouge">_config.yml</code> 并不相同，具体配置不在此赘述</p>

<h3 id="修改添加博客内容">修改、添加博客内容</h3>

<p>对于个人信息，站点标题之类的配置，请修改文件 <code class="language-plaintext highlighter-rouge">/blog/_config.yml</code><br />
具体参见<a href="https://hexo.io/docs/configuration.html">官方配置文档</a></p>

<div class="language-yaml highlighter-rouge"><div class="highlight"><pre class="highlight"><code><span class="c1"># Site</span>
<span class="na">title</span><span class="pi">:</span> <span class="s2">"</span><span class="s">natsurainko</span><span class="nv"> </span><span class="s">的博客"</span>
<span class="na">subtitle</span><span class="pi">:</span> <span class="s2">"</span><span class="s">Forever</span><span class="nv"> </span><span class="s">young</span><span class="nv"> </span><span class="s">erver</span><span class="nv"> </span><span class="s">strong</span><span class="nv"> </span><span class="s">ever</span><span class="nv"> </span><span class="s">brave"</span>
<span class="na">description</span><span class="pi">:</span> <span class="s2">"</span><span class="s">这里能看到我的一些开发经历和一些开发教程，&lt;br&gt;希望能对你有所帮助"</span>
<span class="na">keywords</span><span class="pi">:</span>
<span class="na">author</span><span class="pi">:</span> <span class="s">Natsurainko</span>
<span class="na">language</span><span class="pi">:</span> <span class="s">zh</span>
<span class="na">timezone</span><span class="pi">:</span> <span class="s1">'</span><span class="s">'</span>
</code></pre></div></div>

<p>创建一篇新文章或者新的页面，请在 <code class="language-plaintext highlighter-rouge">/blog</code> 目录下运行这条命令</p>
<div class="language-bash highlighter-rouge"><div class="highlight"><pre class="highlight"><code>hexo new <span class="o">[</span>layout] &lt;title&gt;
</code></pre></div></div>
<p>具体参见<a href="https://hexo.io/zh-cn/docs/writing">官方写作文档</a></p>

<h3 id="部署-hexo-到-github-pages">部署 hexo 到 GitHub Pages</h3>

<p>请先修改文件 <code class="language-plaintext highlighter-rouge">/blog/_config.yml</code>，例如</p>

<div class="language-yaml highlighter-rouge"><div class="highlight"><pre class="highlight"><code><span class="na">deploy</span><span class="pi">:</span>
  <span class="na">type</span><span class="pi">:</span> <span class="s">git</span>
  <span class="na">repo</span><span class="pi">:</span> <span class="s">https://github.com/&lt;username&gt;/&lt;username&gt;.github.io.git</span>
  <span class="na">branch</span><span class="pi">:</span> <span class="s">main</span>
</code></pre></div></div>

<p>再安装部署工具 <code class="language-plaintext highlighter-rouge">hexo-deployer-git</code>，在 <code class="language-plaintext highlighter-rouge">/blog</code> 文件夹下运行</p>
<div class="language-bash highlighter-rouge"><div class="highlight"><pre class="highlight"><code>npm <span class="nb">install </span>hexo-deployer-git <span class="nt">--save</span>
</code></pre></div></div>

<p>最后再运行</p>

<div class="language-bash highlighter-rouge"><div class="highlight"><pre class="highlight"><code>hexo clean      <span class="c">#清除之前生成的东西</span>
hexo generate   <span class="c">#生成静态文章，缩写hexo g</span>
hexo deploy     <span class="c">#部署文章，缩写hexo d</span>
</code></pre></div></div>

<blockquote>
  <p><strong>注意：</strong>
<code class="language-plaintext highlighter-rouge">hexo deploy</code> 命令会覆写仓库下 <code class="language-plaintext highlighter-rouge">main</code> 分支之前所有的提交，<br />
所以最开始不建议将代码文件直接放在 <code class="language-plaintext highlighter-rouge">main</code> 分支下<br />
且该命令会创建 <code class="language-plaintext highlighter-rouge">/blog/.deploy_git</code> 文件夹，用于存放之前的提交，<br />
如果删除了这个文件夹，下一次部署的时候之前的提交记录就会丢失</p>
</blockquote>

<h3 id="至此完成部署">至此完成部署</h3>

<p>请访问 <code class="language-plaintext highlighter-rouge">http://&lt;username&gt;.github.io</code> 以访问你的博客</p>]]></content><author><name>natsurainko</name></author><category term="开发实践" /><category term="hexo" /><category term="github-pages" /><category term="web" /><summary type="html"><![CDATA[本文参考文章地址]]></summary></entry></feed>